I couldn't find any how-tos on the internet, so i learned the hard
way and removed most of the screws from my unit. There should
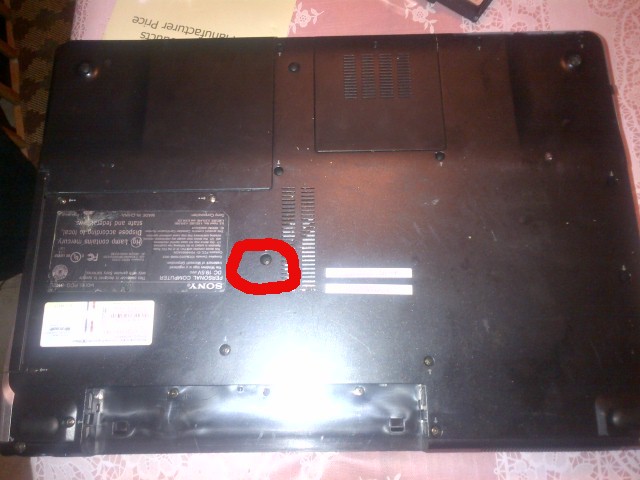
only be 4 screws you need to remove from the bottom:
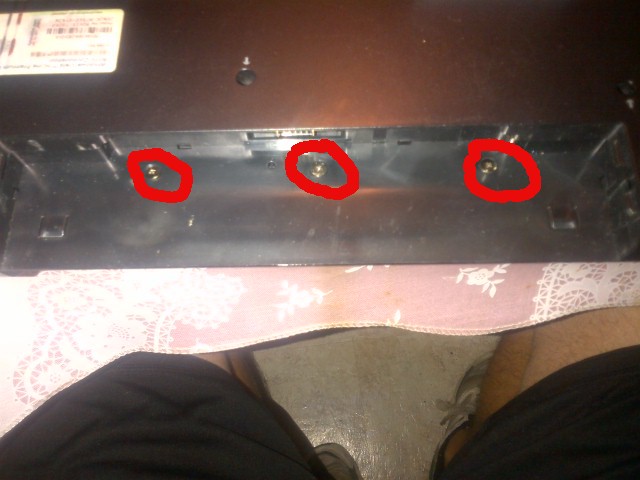
Take out the battery and remove the 3 screws which are now exposed.
Remove the screw new to the label; i believe this is the one which
hold the center of the keyboard down.
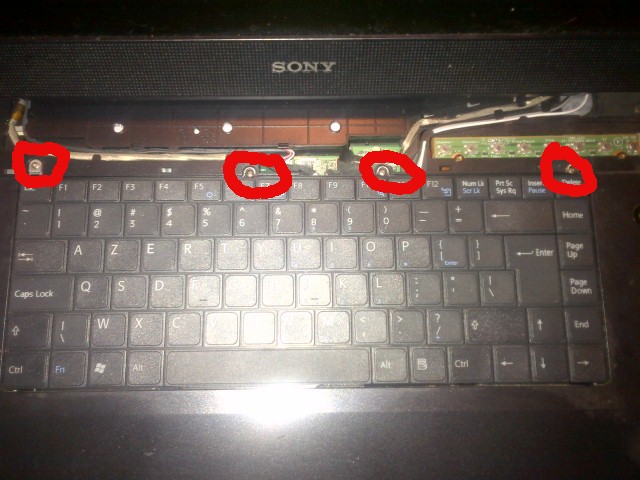
Remove the top strip which covers the audio buttons. Now the 4
screws along the top can be removed.
Note: No more pics to follow.
Now gentle lift the keyboard and the ribbon cable will be
exposed. It appeared to just slide out (it didn't seem to have a
clasp to lift). Make a note of how far the cable was inserted for
reference when you re-install. I was able to push the new cable
in with my fingers. You might test the keyboard prior to
replacing the screws. Note that i always work with the battery
removed/power disconnected. Reverse above steps to install.